My second semester at Kent State’s Costume MFA program was a rollercoaster for sure. Beginning with my first design at Kent, Parade, and ending with the struggle of adapting to online classes, I found new challenges and ways to overcome them.


Research
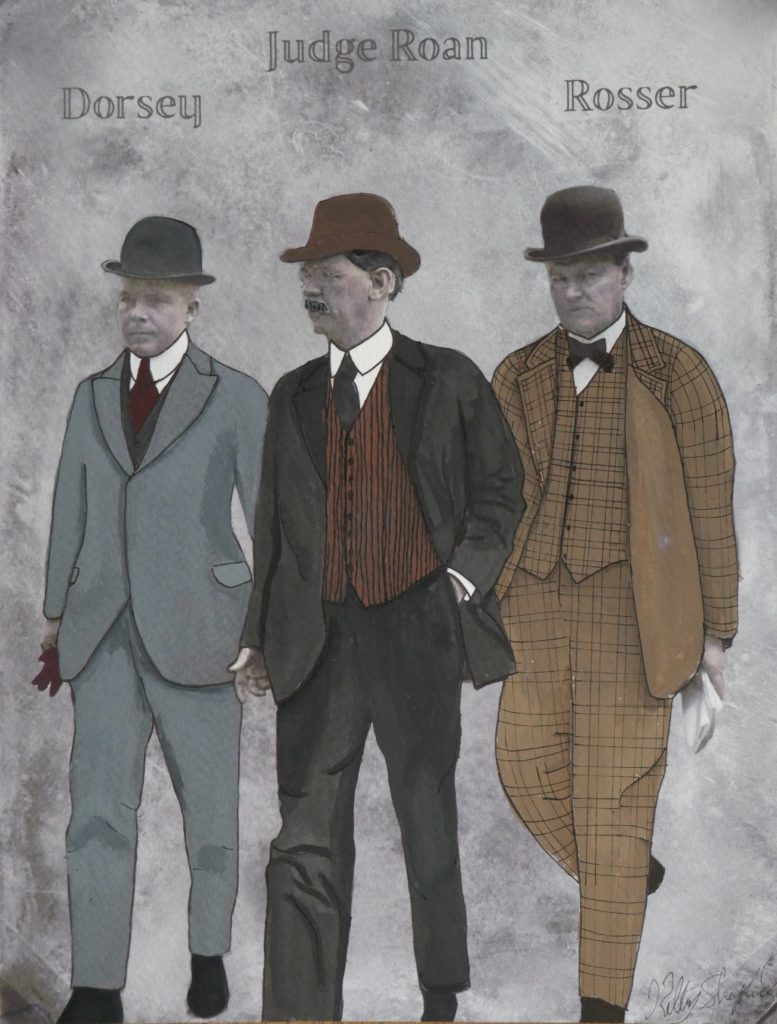
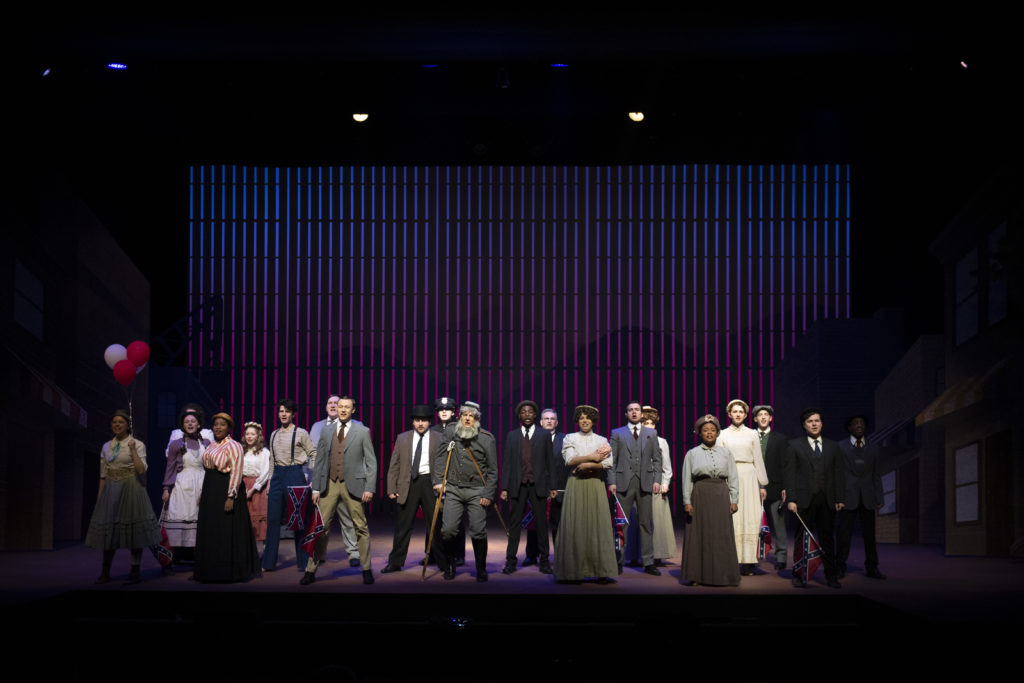
With a play set in a historic event, the research for my design was vital to help ground it in reality. My inspiration came from the real people the characters are based on in the musical which takes place in 1913-1915 Atlanta, Georgia. My research sources include catalogs from the time period. I drew upon the photographs of the trial, in particular, to grasp what they used to wear. My color scheme came from the colorized black and white photographs. Because those photographs are either under-saturated or over-saturated, giving a tinge of “fakeness.” I used muted jewel tones as well as pastel colors for some characters.
[ngg src=”galleries” ids=”24″ display=”basic_slideshow”]Renderings
Using this research as inspiration I proceed to render my designs, incorporating images from the period into the style of my renderings.
Bringing Design into Reality
With a show the size of Parade, there were many costumes to cultivate, so I sat down with the costume shop to determine which costumes to build, buy/rent, or pull from stock.
Builds
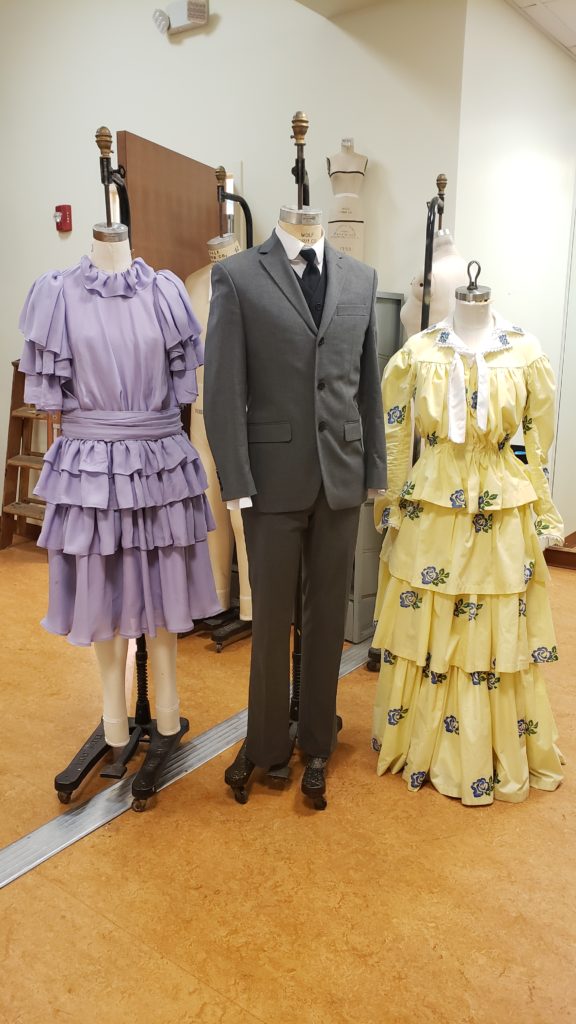
[ngg src=”galleries” ids=”26″ display=”basic_slideshow” arrows=”1″]We had a total of 7 builds, Mary’s dress, Lucille’s day dress, Sally’s blouse jacket ensemble and Sally’s ball gown, Judge Roan’s vest, and Angela and Mrs. Phagan’s shirts.
Lucille
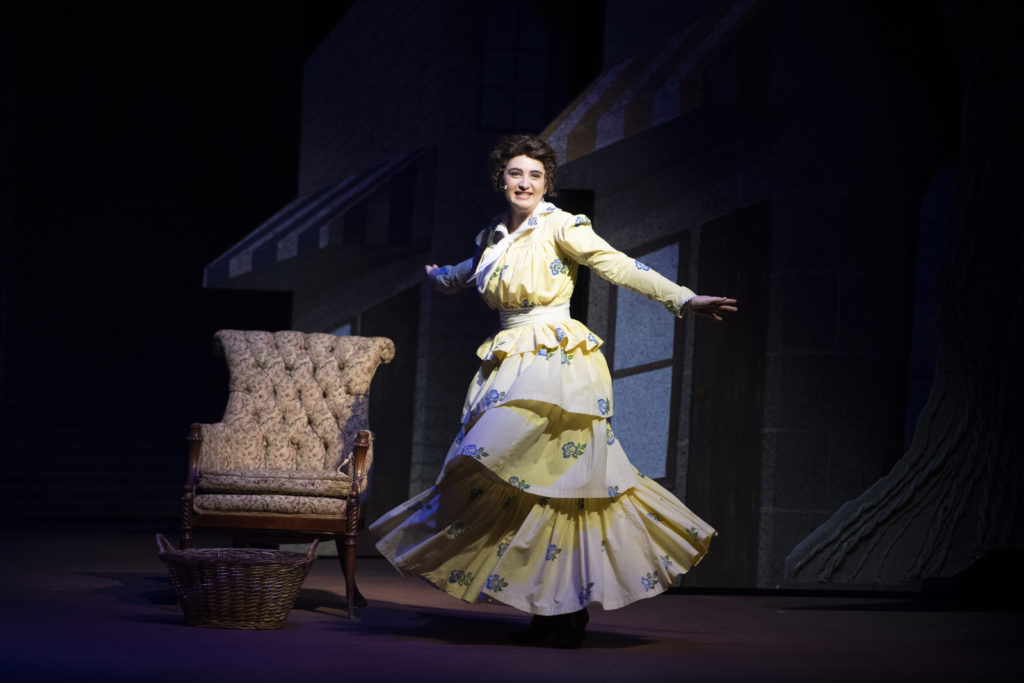
One of the most significant builds for me in this production was Lucille’s dress. Draped by Kerry Jo Bauer, this design showed the femininity and grace of Mrs. Frank.
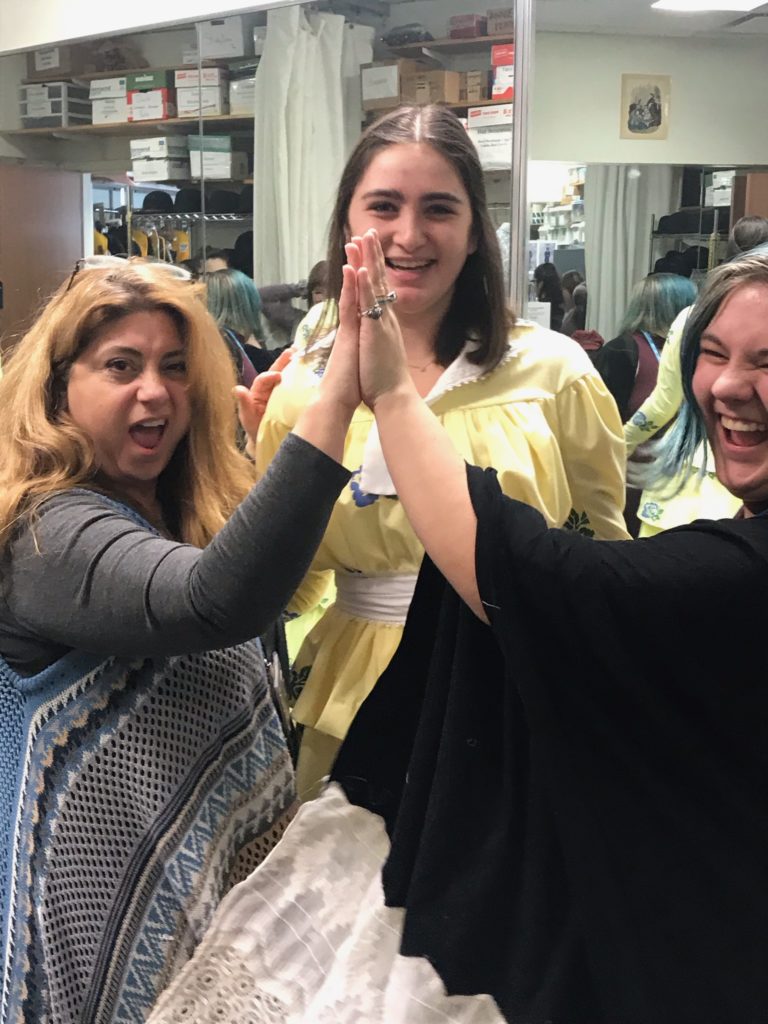
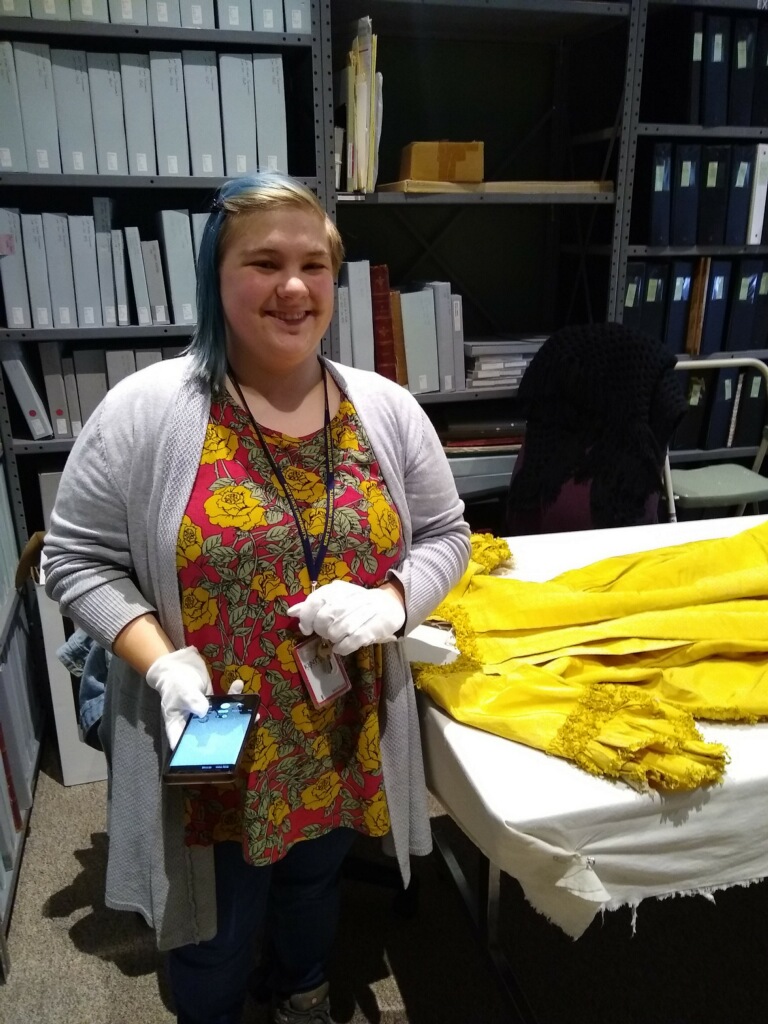
While exploring options for the yellow fabric with blue floral print, I first attempted to order the fabric through the website Spoonflower. When the fabric arrived the creamy yellow had instead a strangely green tone. With printed fabric out of the question, we decided the best next step would be hand-stenciled roses on yards of yellow cotton.
[ngg src=”galleries” ids=”27″ display=”basic_slideshow” arrows=”1″]We spent 9 hours with a team of four stenciling 112 individual roses onto the fabric, using Shiva paint sticks. We also crafted custom embroidery for the collar of the dress.
Buying, Renting, and Pulling
How to stay organized with a cast of 27 actors
Being relatively new to the role of a costume designer – and nearly doubling the number of actors, let alone characters, from my previous design experience – I knew I had a lot of unknown roads ahead of me. But I also knew I had a great team behind me, my mentors in the costume shop, design guidance in my professor Michelle, and the hard work of my assistants and every single person in the costume shop.
[ngg src=”galleries” ids=”28″ display=”basic_slideshow” arrows=”1″]
Countless fittings, hours in stock rooms, two trips to Cleveland, and online shopping was all required to complete my design of Parade. I invented a color coded way to stay organized and I also employed the “broad strokes to details” approach. For example, I made sure everyone had their main pieces such as an ensemble of pants, vest, and jacket first, and then added details like hats, ties, and jewelry later. Then, sooner than I could have anticipated Parade was ready to be handed over to the dressers, and my role was complete.
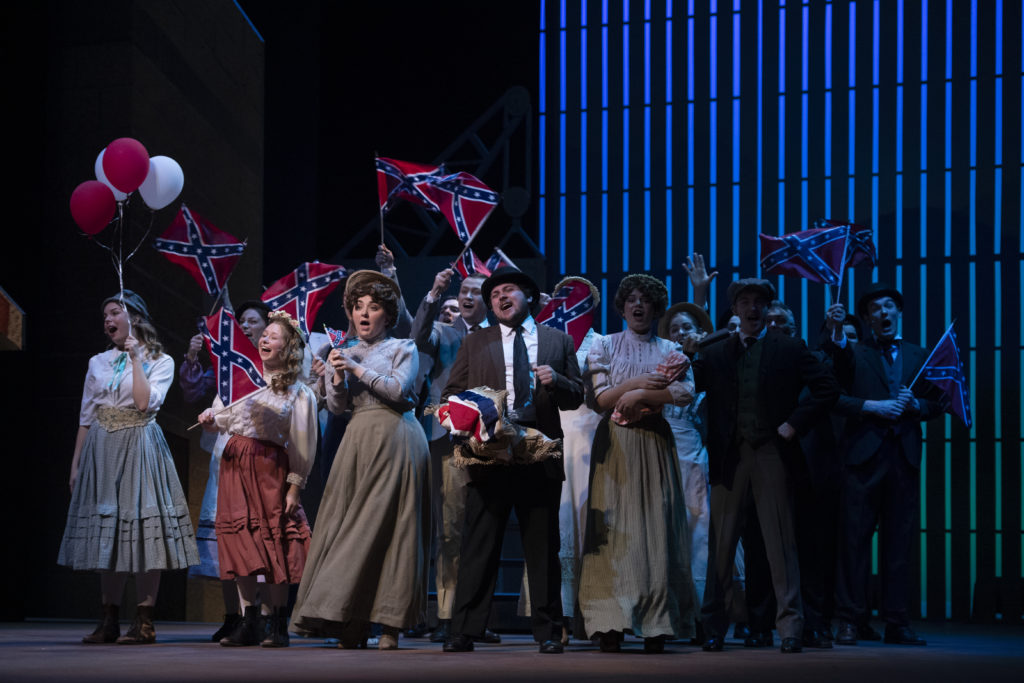
Time for the Show
[ngg src=”galleries” ids=”29″ display=”basic_slideshow” arrows=”1″]Courses – Costume Design + Costume History
The two costume related courses in this semester were Design Studio: Costume, and History of Costume/Textiles for Theatre.
In Costume Design, we continued to explore our techniques for designing a show from the script up. Exploring the plays Hedda Gabler, Dog Act, and Once Upon a Mattress, I created world collages, sketches, paperwork, and full renderings for each play. Below is a selection of my work from this class.
[ngg src=”galleries” ids=”30″ display=”basic_slideshow” arrows=”1″]In costume history, we studied styles and trends of the periods from the 18th century, to the 1980s. Each period we would create a re-drawing. A very thorough assignment that helped me understand the changes and popular looks of each time period. The assignment each week was as follows:
- A drawn copy of a male and female silhouette
- Ten terms identified each on the male and female drawings which then must be defined and alternatives given for how they can be achieved for the theatre (what fabrics, alternative shaping garments, rigged understructure, etc.)
- Four primary resource pictures, cited, with a 3-4 sentence summary of fashion elements found in the resource
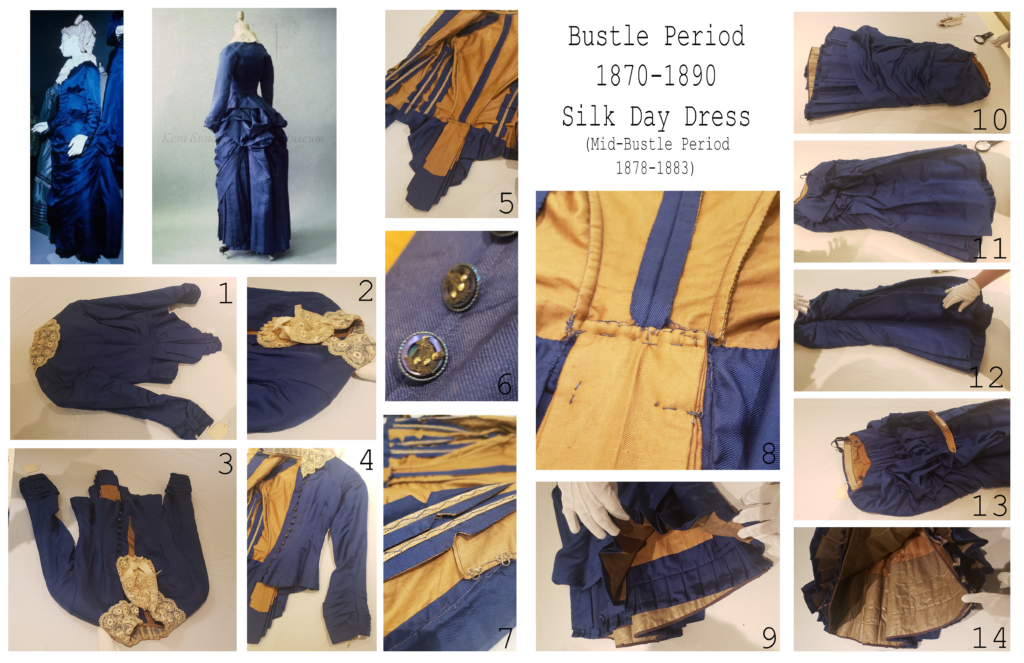
I was also granted the ability to look at extant garments from each time period at the KSU Museum Fashion Archives. This was a thrilling experience for me, and although the Covid-19 pandemic shutting down the school has stopped my visits to the museum for now, I will be happy to continue to study these garments after we return in the fall.
[ngg src=”galleries” ids=”31″ display=”basic_slideshow” arrows=”1″]Intro to Grad Studies
Julie-Taymor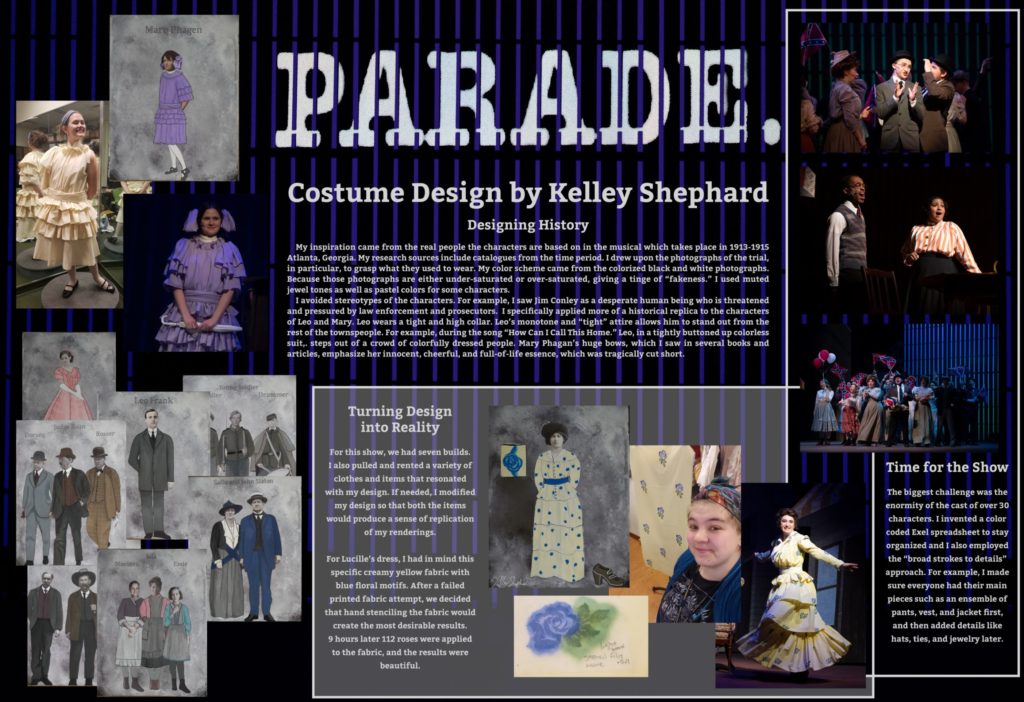
Covid-19 + The Transition Online

Teaching
At the beginning of the semester, I was settling into teaching the Costume Lab for freshmen, and the advanced version of the lab that met on Fridays. I felt a significant increase in confidence, compared to the past semester, and I was excited to meet a whole new group of students! Unfortunately, there was a pandemic sized wrench thrown into the predictable plans I had laid out.
I approached each class section differently: the two standard labs, I created a weekly schedule and uploaded the videos demonstrating the steps on hand stitching their backpack projects together. The students also had weekly checkpoints to upload their work, on Blackboard. For the advanced lab,I had confidence my students would prefer to work at their own pace, as some were more advanced than others. I recorded the entire project and posted it, asking students to provide updates on the Blackboard discussion board each week. I kept in touch through email and both classes my students emailed their questions. One question was not being clarified through email, so I made a short video explaining the step that the student was confused about.
Spring Break Productivity
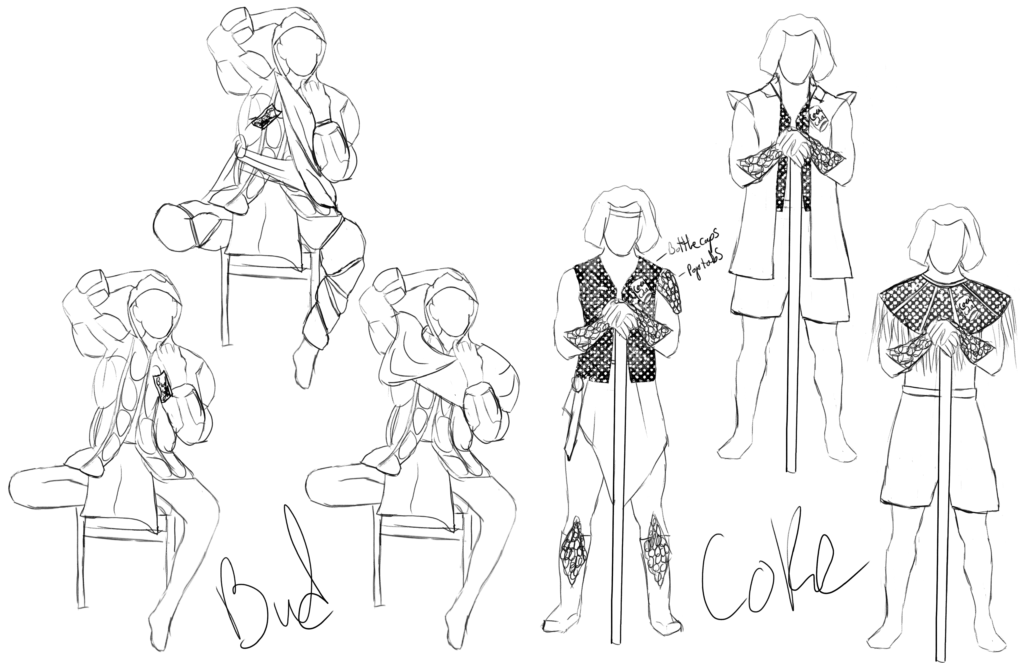
Although the latter half of the semester was a struggle to get things completed, spring break was a flourish of free time and creativity. I had the time to complete a cosplay commission I had started over winter break.

My client had dreamed of this costume for years and was excited that I could help make her dream a reality. I drafted the patterns for the corset, skirt, sleeves, neck corset, and gloves.
[ngg src=”galleries” ids=”32″ display=”basic_slideshow” arrows=”1″]I also utilized my experience with the Thermo-reactive plastic, Worbla, and my dabbling in weaving chainmail to create the headpiece and mask.
[ngg src=”galleries” ids=”33″ display=”basic_slideshow” arrows=”1″]My original plans for the sleeve embroidery were to use my embroidery machine, however,it would not fit in my car on the way to quarantine, so I enlisted the help of a friend to do the embroidery.
I am proud of my results with this commission and enjoyed the process of creation. The photos of my process are in the collection below.
[ngg src=”galleries” ids=”34″ display=”basic_slideshow” arrows=”1″]Other Alteration Work While Quarantined
While missing the costume shop, and staring down the large pile of personal alterations I brought with me, I picked up a few corsets I had ordered online and got to work on making them fit myself better.
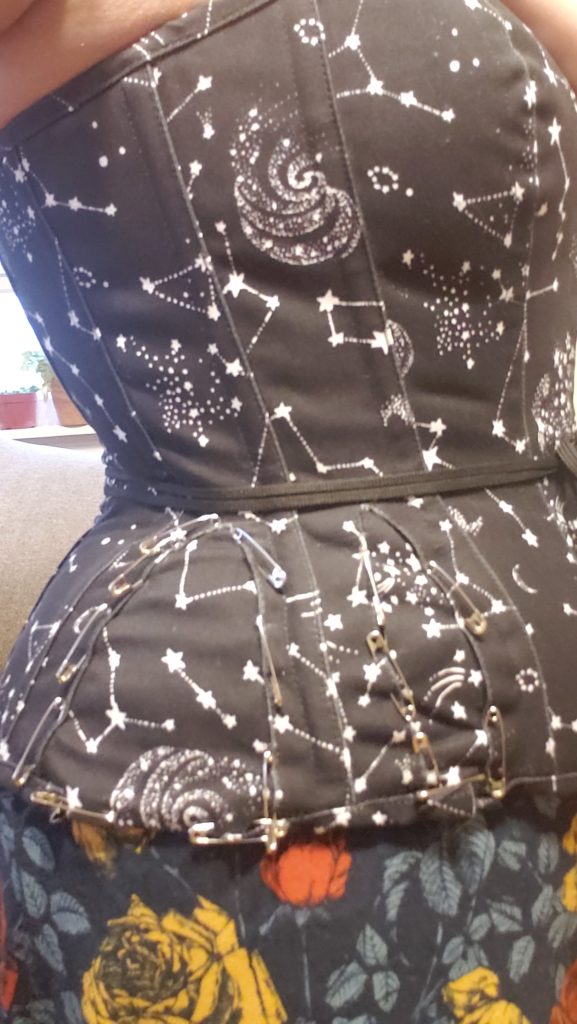
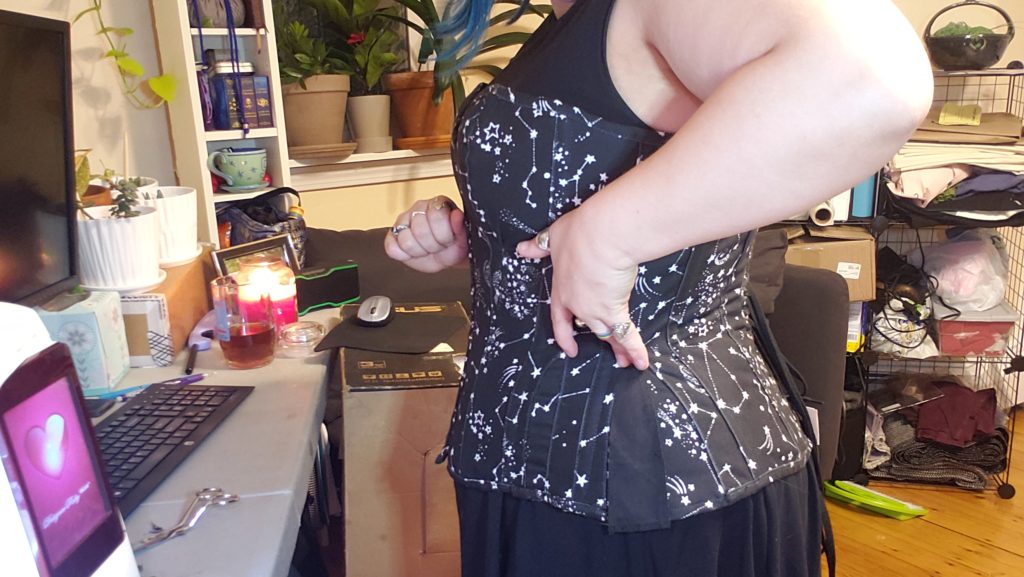
The first corset I worked on was this overbust constellation corset. Although the website advertised it as a “curvier” option, it did not fit properly over my hips, making the bust feel like it was too large. I started with the hip alteration, and when complete the bust fit perfectly fine. You can see in the second picture the small hip gores that I replaced with fabric taken from the modesty panel in the back.

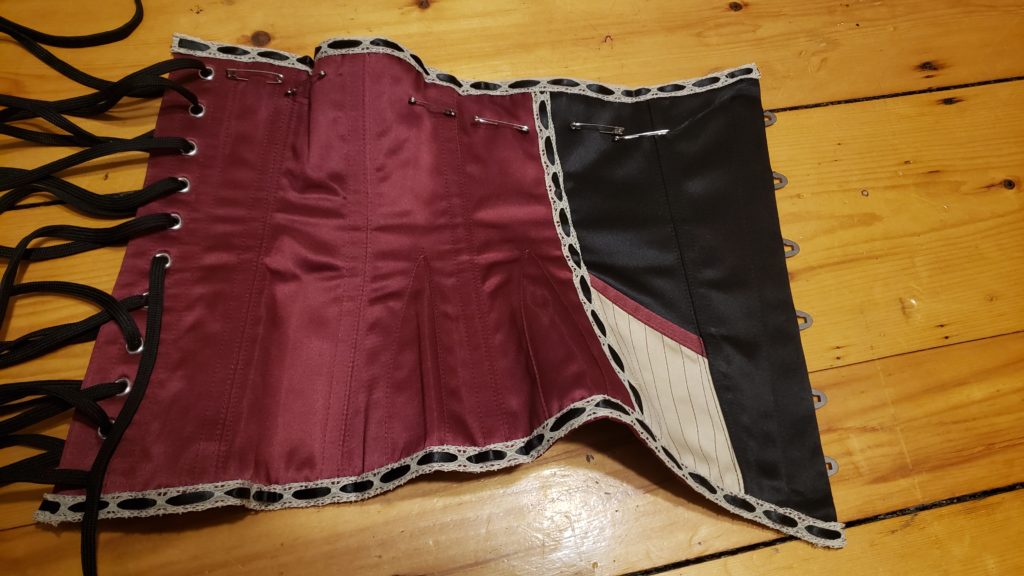
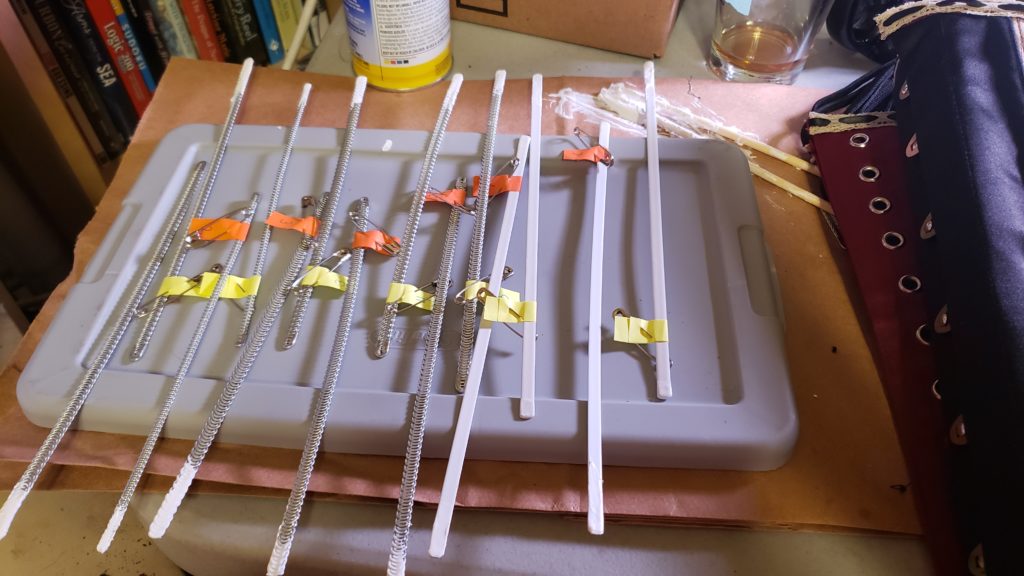
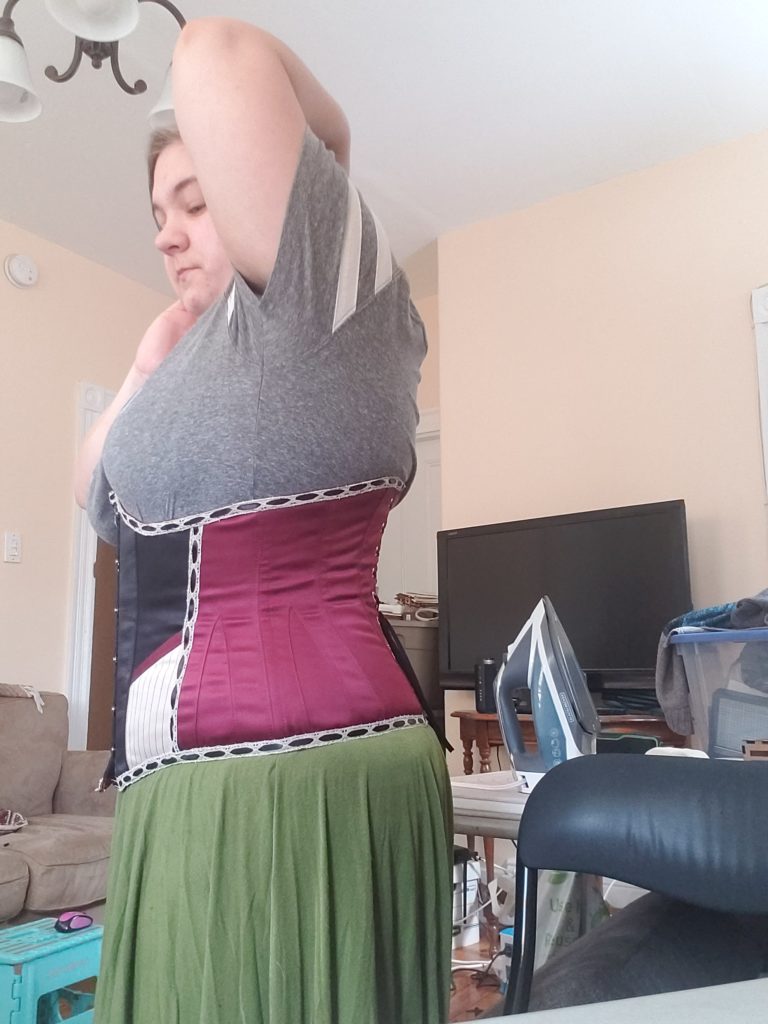
The second corset I altered was this underbust corset. I have a shorter than standard torso, and the top edge of the corset was digging in uncomfortably. I removed the top binding,and slipped out and numbered each bone to make sure they returned to the correct spot. Then pinned a corrected top line, and trimmed each bone accordingly. After dipping each end the bones were slipped in and the trim hand stitched back along the top edge.
Final Thoughts
Although this semester ended in a way none of us could have expected, putting together this semester review truly demonstrated the amount of work I still managed to accomplish.